
The Trustible platforms supports a Databricks integration that allows transferring data into the Inventory. This guide covers how to set-up the integration and transfer data into the platform.
Note: Currently we only support transferring MLFlow metrics/parameters into specific Model Card fields.The Trustible platforms supports a Databricks integration that allows transferring data into the Inventory. This guide covers how to set-up the integration and transfer data into the platform.
Note: Currently we only support transferring MLFlow metrics/parameters into specific Model Card field
Set-up [Admin-Only]
To connect to Databricks, you will need to set-up a Service Principal and grant it access to the relevant models/notebooks/files in your Workspace. A service principal is a separate identity for connecting to external services - this will give you fine-grained control over what Trustible can access. You can read in depth instructions for generating tokens in the Databricks Documentation.
To add a token into the platform:
- Create a personal access tokens for the Service Principle following the Databricks Documentation. It will look like
dapixxxx - Go to https://app.trustible.ai/integrations/databricks/create-token/ and enter info for this token:
- Unique Key: An identifier for tracking keys in Trustible
- Databricks Url: Link to workspace (
https://dbc-{XXX}.cloud.databricks.com) - Databricks Access Token: Token from Step 1
MLFlow Data Transfer
The MLFlow Integration is currently available for specific fields on the Model Card.
To use the integration, the following conditions must be met:
- The “Registered Model” has a Run associated with it
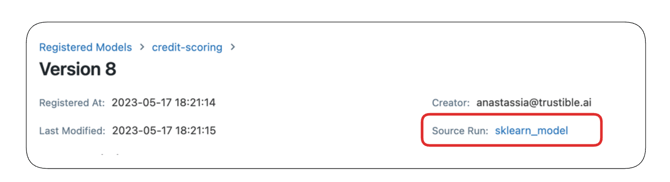
- The Service Principle has access to the Registered Model and Run.
.png?width=670&height=279&name=Untitled%20(1).png)
Copying over the data:
1. If the Databricks Integration is available, then the “Databricks” button will be available in Edit mode for the field:.png?width=670&height=315&name=image%20(6).png)
-
- Registered Model: Will identify the Run associated with the latest version of the model
.png?width=670&height=295&name=Untitled%20(2).png)
- Specific Run ID
3. The next view will show you all the available Metrics/Parameters. Select the ones that should be copied over and add custom names/comments. This data will be stored as a special JSON on the field. When you are done, clickCopy to Form..png?width=670&height=480&name=image%20(7).png)
4. The data will be copied into the field as a Table - you can change the formatting as needed..png?width=670&height=189&name=image%20(8).png)
- Registered Model: Will identify the Run associated with the latest version of the model